Add AI Assistant UI to your Application
Quick start guide to add the AI assistant UI to your React application.
Installation
First, install the required packages:
yarn add @openassistant/core @openassistant/ui @nextui-org/react framer-motion html2canvas
Basic Setup
Add the AI Assistant component to your app by importing it from @openassistant/ui:
import { AiAssistant } from '@openassistant/ui';
// Only needed for React apps without TailwindCSS
import '@openassistant/ui/dist/index.css';

export default function MyAssistant() {
  const assistantProps = {
    name: 'My AI Assistant',
    description: 'This is my AI assistant',
    version: '1.0.0',
    modelProvider: 'openai', // or 'ollama' for local models
    model: 'gpt-4', // or 'llama2' for Ollama
    apiKey: 'your-api-key', // not needed for Ollama
    welcomeMessage: 'Hi, I am your AI assistant',
    instructions:
      "You are a data analyst. You can help users analyze data including creating charts, querying data, and creating maps. If a function calling can be used to answer the user's question, please always confirm the function calling and its arguments with the user.",
    functions: [],
  };

  return <AiAssistant {...assistantProps} />;
}
TailwindCSS Integration
If you're using TailwindCSS, configure your tailwind.config.js to include the necessary UI components:
import { nextui } from '@nextui-org/react';

module.exports = {
  content: [
    // your original content
    './node_modules/@openassistant/ui/dist/**/*.{js,ts,jsx,tsx}',
    './node_modules/@nextui-org/theme/dist/**/*.{js,ts,jsx,tsx}',
  ],
  darkMode: 'class',
  plugins: [nextui()],
};
Include TailwindCSS directives in your main CSS file:
@tailwind base;
@tailwind components;
@tailwind utilities;
Work with Next.js
For Next.js applications, render the OpenAssistant UI client-side using the use client directive:
'use client';

import { AiAssistant } from '@openassistant/ui';

export default function MyAssistant() {
  // ... assistant configuration ...
}
Using with Ollama (Local Models)
To use OpenAssistant with local models via Ollama:
const assistantProps = {
name: 'My Assistant',
modelProvider: 'ollama',
model: 'llama2',
baseUrl: 'http://127.0.0.1:11434',
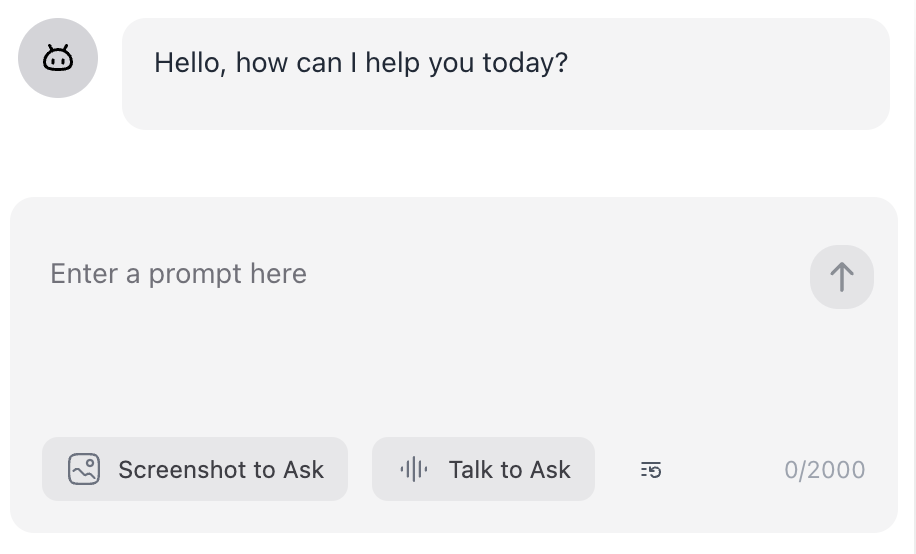
welcomeMessage: 'Hello, how can I help you today?',
instructions: 'You are a helpful assistant.',
functions: [],
};
Start the server with CORS enabled for local development with Ollama:
OLLAMA_ORIGINS=* ollama serve
Theme Support
The UI supports both light and dark themes using next-themes. Enable theme switching:
import { AiAssistant } from '@openassistant/ui';
import { ThemeProvider } from 'next-themes';

function App() {
  return (
    <ThemeProvider attribute="class">
      <AiAssistant {...assistantProps} />
    </ThemeProvider>
  );
}
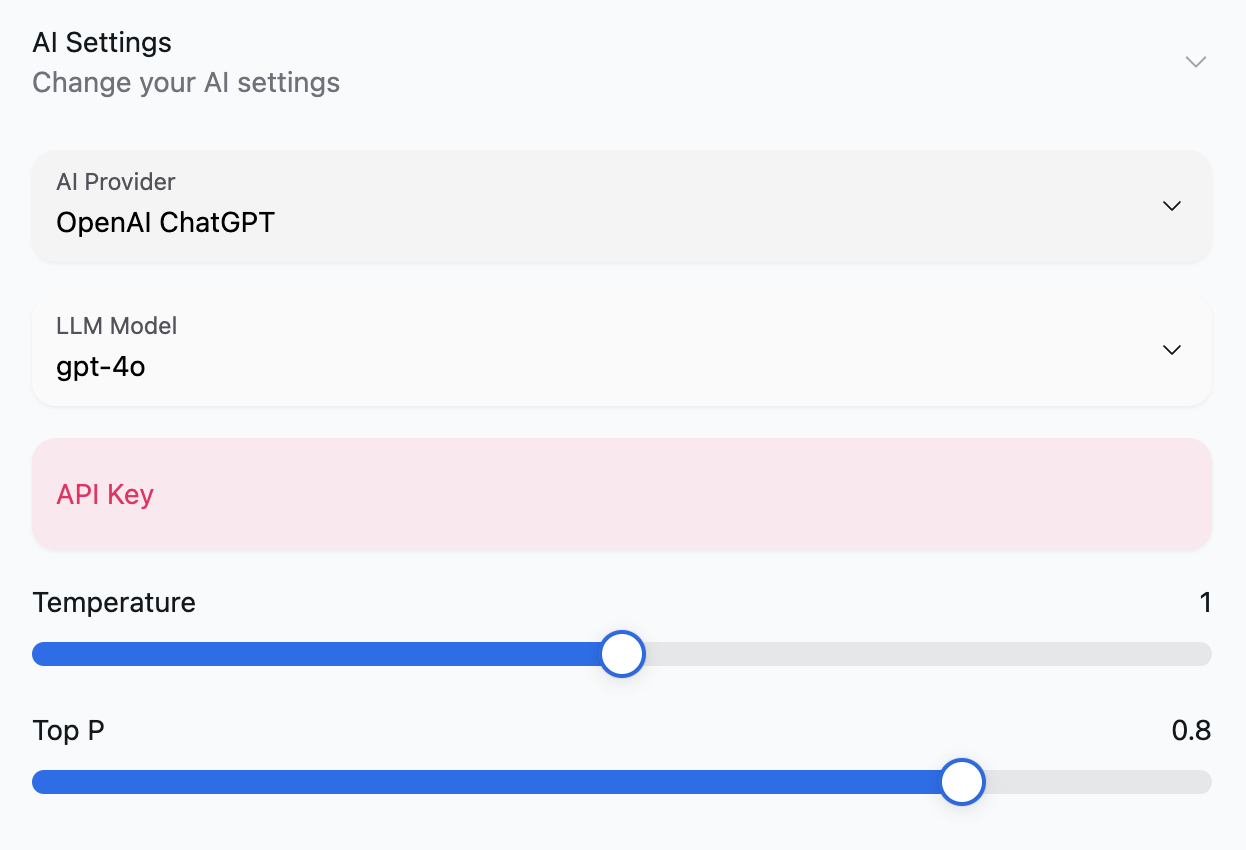
2. Using the Config Panel Component
The ConfigPanel component provides a user-friendly interface for configuring the AI Assistant's settings, including selecting the AI provider, choosing the model, managing API keys, and adjusting parameters like temperature and top P.
Basic Usage
Here's a simple example of how to integrate the ConfigPanel into your application:
import { useState } from 'react';
import { ConfigPanel, AiAssistantConfig } from '@openassistant/ui';

export default function ConfigTutorial() {
  const [aiConfig, setAiConfig] = useState<AiAssistantConfig>({
    isReady: false,
    provider: 'openai',
    model: 'gpt-4',
    apiKey: '',
    baseUrl: 'http://localhost:11434',
    temperature: 0.8,
    topP: 0.8,
  });

  const handleConfigChange = (config: AiAssistantConfig) => {
    setAiConfig(config);
    // Additional logic when configuration changes
  };

  return (
    <div className="p-4">
      <h2 className="text-xl mb-4">Configure Your AI Assistant</h2>
      <ConfigPanel
        initialConfig={aiConfig}
        onConfigChange={handleConfigChange}
        showParameters={true}
      />
    </div>
  );
}
ConfigPanel Props and Types
The ConfigPanel component accepts several props to manage its behavior and configuration:
export type ConfigPanelProps = {
  defaultProviderModels?: Record<Provider, string[]>;
  initialConfig?: AiAssistantConfig;
  showStartChatButton?: boolean;
  showParameters?: boolean;
  color?:
    | 'default'
    | 'primary'
    | 'secondary'
    | 'success'
    | 'warning'
    | 'danger';
  onConfigChange: (config: AiAssistantConfig) => void;
};
- defaultProviderModels: (Optional) Custom models for each AI provider.
- initialConfig: (Optional) Initial configuration settings.
- showStartChatButton: (Optional) Displays a "Start Chat" button.
- showParameters: (Optional) Shows parameter sliders for temperature and top P.
- color: (Optional) Button color variant.
- onConfigChange: Callback function triggered when configuration changes.
The AiAssistantConfig type defines the structure of the configuration object:
export type AiAssistantConfig = {
  isReady: boolean;
  provider: Provider;
  model: string;
  apiKey: string;
  baseUrl: string;
  temperature: number;
  topP: number;
};
Explanation
- State Management: The
aiConfigstate holds the current configuration. Updating this state allows the application to react to configuration changes. - handleConfigChange: This function updates the state and can include additional logic, such as initializing the AI Assistant once configurations are set.
- ConfigPanel Integration: The
ConfigPanelis rendered with initial configurations and listens for changes via theonConfigChangecallback.
Advanced Configuration
The ConfigPanel offers advanced features like selecting different AI providers, managing API keys, and adjusting model parameters.
Selecting an AI Provider and Model
Users can select from various AI providers and corresponding models:
import { useState } from 'react';
import { ConfigPanel, AiAssistantConfig } from '@openassistant/ui';

export default function AdvancedConfig() {
  const [aiConfig, setAiConfig] = useState<AiAssistantConfig>({
    isReady: false,
    provider: 'google',
    model: 'gemini-1.5-flash',
    apiKey: '',
    baseUrl: '',
    temperature: 0.7,
    topP: 0.9,
  });

  const handleConfigChange = (config: AiAssistantConfig) => {
    setAiConfig(config);
    // Initialize AI Assistant or perform other actions
  };

  return (
    <div className="p-4">
      <h2 className="text-xl mb-4">Advanced AI Configuration</h2>
      <ConfigPanel
        initialConfig={aiConfig}
        onConfigChange={handleConfigChange}
        showParameters={true}
        color="secondary"
      />
    </div>
  );
}
Managing API Keys and Base URLs
Depending on the selected provider, users can input their API keys or Base URLs:
{
  provider !== 'ollama' ? (
    <Input
      type="string"
      label="API Key"
      placeholder="Enter your OpenAI API key"
      className="max-w-full"
      onChange={onApiKeyChange}
      value={apiKey || ''}
      required
      isInvalid={connectionError || apiKey.length === 0}
    />
  ) : (
    <Input
      type="string"
      label="Base URL"
      placeholder="Enter your Ollama API URL"
      className="max-w-full"
      required
      onChange={onBaseUrlChange}
    />
  );
}
Adjusting Model Parameters
Enable users to tweak parameters like temperature and topP for model behavior:
{
  props.showParameters && (
    <>
      <Slider
        label="Temperature"
        step={0.1}
        maxValue={2}
        minValue={0}
        defaultValue={1.0}
        value={temperature}
        className="max-w-full"
        onChange={onTemperatureChange}
      />
      <Slider
        label="Top P"
        step={0.1}
        maxValue={1}
        minValue={0}
        defaultValue={0.8}
        value={topP}
        className="max-w-full"
        onChange={onTopPChange}
      />
    </>
  );
}
Integration with AiAssistant
Integrate the ConfigPanel with the AiAssistant component to dynamically configure the assistant based on user input.
import { AiAssistant, ConfigPanel, AiAssistantConfig } from '@openassistant/ui';
import { useState, useMemo, useEffect } from 'react';

export default function Assistant({
  screenCaptured,
  setScreenCaptured,
  setStartScreenCapture,
}) {
  const [aiConfig, setAiConfig] = useState<AiAssistantConfig>({
    isReady: false,
    provider: 'openai',
    model: 'gpt-4o',
    apiKey: '',
    baseUrl: 'http://127.0.0.1:11434',
    temperature: 0.8,
    topP: 1.0,
  });

  const assistantProps = useMemo(
    () => ({
      name: 'My AI Assistant',
      description: 'This is my AI assistant',
      version: '1.0.0',
      modelProvider: aiConfig.provider,
      model: aiConfig.model,
      apiKey: aiConfig.apiKey,
      welcomeMessage: 'Hi, I am your AI assistant',
      instructions: 'Your AI instructions here...',
      functions: [], // Define your functions
    }),
    [aiConfig]
  );

  const handleConfigChange = (config: AiAssistantConfig) => {
    setAiConfig(config);
    // Additional actions like re-initializing the assistant
  };

  return (
    <AiAssistant
      {...assistantProps}
      historyMessages={[
        {
          message: 'Welcome!',
          direction: 'incoming',
          position: 'single',
          payload: (
            <div className="mt-4">
              <ConfigPanel
                initialConfig={aiConfig}
                onConfigChange={handleConfigChange}
              />
            </div>
          ),
        },
      ]}
      isMessageDraggable={true}
      enableVoice={true}
      enableScreenCapture={true}
      screenCapturedBase64={screenCaptured}
      onScreenshotClick={() => setStartScreenCapture(true)}
      onRemoveScreenshot={() => setScreenCaptured('')}
    />
  );
}
Explanation
- State Management: The
aiConfigstate keeps track of the current configuration. - assistantProps: Configures the
AiAssistantcomponent based onaiConfig. - ConfigPanel Integration: Embedded within
historyMessagesto allow users to configure settings directly from the chat interface.
Error Handling and Validation
The ConfigPanel includes built-in error handling to manage invalid API keys or Base URLs.
{
  connectionError && <div className="text-red-500 text-sm">{errorMessage}</div>;
}
This ensures a smooth user experience, with clear feedback on any configuration issues.
Customization Options
Customize the appearance and behavior of the ConfigPanel using available props.
Button Color
Choose from predefined color variants for the "Start Chat" button:
<Button
  isLoading={isRunning}
  onClick={onStartChat}
  className="mt-4"
  color={props.color || 'primary'}
>
  Start Chat
</Button>
Supported colors include 'default', 'primary', 'secondary', 'success', 'warning', and 'danger'.
Showing Parameter Sliders
Enable or disable the display of parameter sliders (temperature and topP):
<ConfigPanel
  initialConfig={aiConfig}
  onConfigChange={handleConfigChange}
  showParameters={true} // Set to false to hide sliders
/>
The ConfigPanel component offers a comprehensive solution for managing AI Assistant configurations within your React application. By following this tutorial, you can effectively integrate, customize, and utilize the ConfigPanel to enhance the usability and functionality of your AI-powered features.