OpenAssistant
OpenAssistant is a javascript library helping your build your AI application with powerful data analysis tools and an interactive React chat component.
| Category | Tool/Feature | Description |
|---|---|---|
| Plot Tools @openassistant/plots | Vega-Lite | All plot types using Vega-Lite |
| eCharts | interactive plots: box plot, bubble chart, histogram, parallel coordinates, scatter plot with regression lines | |
| GeoTools @openassistant/osm | Geocoding | Geocode addresses using OSM API |
| Routing | Calculate driving routes using Mapbox API | |
| Isochrone | Calculate isochrones using Mapbox API | |
| Geographic boundaries | retrieve U.S. state/county/zipcode boundaries | |
| Map Tools @openassistant/map | Kepler.gl | Interactive map visualization using Kepler.gl |
| Leaflet map | Web mapping using Leaflet | |
| SQL Tools @openassistant/duckdb | Local data querying | Query local data using in-browser DuckDB SQL |
| Table operations | Merge, filter, sort, group by, aggregate, etc. | |
| Data Analysis Tools @openassistant/geoda | Data classification | Quantile, equal interval, natural breaks, standard deviation, percentile, box, etc. |
| Data standardization | Z-score, deviation from mean, MAD, range adjust, range standardization, etc. | |
| Spatial operations | Buffer, area, centroid, dissolve, length, perimeter, Minimum Spanning Tree, Thiessen polygons (Voronoi diagram), Cartogram. | |
| Spatial join | Spatial join spatial datasets | |
| Spatial dissolve/aggregate | Spatial dissolve/aggregate spatial features | |
| Spatial weights | Queen/rook contiguity, KNN weights, distance-based weights, kernel weights | |
| Global spatial analysis | Global Moran's I, Global Geary's C, Global Join Count | |
| Local spatial analysis (LISA) | Local Moran's I, local Getis-Ord Gi*, local Geary, quantile LISA | |
| Spatial regression | OLS, spatial lag, spatial error model |
Why use LLM tools?
LLMs are fundamentally statistical language models that predict the next tokens based on the context. While emergent behaviors such as learning, reasoning, and tool use enhance the model's capabilities, LLMs do not natively perform precise or complex computations and algorithms. For example, when asked to compute the square root of a random decimal number, ChatGPT typically provides an incorrect answer unless its Python tool is explicitly called to perform the calculation. This limitation becomes even more apparent with complex tasks in engineering and scientific domains. Providing computational tools for LLMs offers a solution for overcoming this problem and helps you successfully integrate LLMs with your applications while keeping the privacy of your data.
Check out the following examples using OpenAssistant in action:
Quick Start
1. Use OpenAssistant tools in your Vercel AI application
Install the tools
For example, using histogram tool from @openassistant/plots:
npm install @openassistant/plots
Add histogram tool to your Vercel AI application:
import { generateText } from 'ai';
import { histogram, HistogramTool } from '@openassistant/plots';
import { convertToVercelAiTool } from '@openassistant/utils';

const histogramTool: HistogramTool = {
  ...histogram,
  context: {
    // get the values of the variable from your dataset, e.g.
    getValues: async (datasetName, variableName) => {
      // you can retrieve the values from your dataset/database, e.g.:
      return [1, 2, 3, 4, 5, 6, 7, 8, 9, 10];
    },
  },
  onToolCompleted: (toolCallId, additionalData) => {
    // the call back function when the tool is completed
    // you can save it or use it to render a histogram component
    console.log('toolCallId: additionalData', toolCallId, additionalData);
  },
};

// use tool with vercel ai sdk
const result = await generateText({
  model: openai('gpt-4o', { apiKey: key }),
  system: 'You are a helpful assistant',
  prompt: 'create a histogram of HR60 in dataset Natregimes',
  tools: { histogram: convertToVercelAiTool(histogramTool) },
});
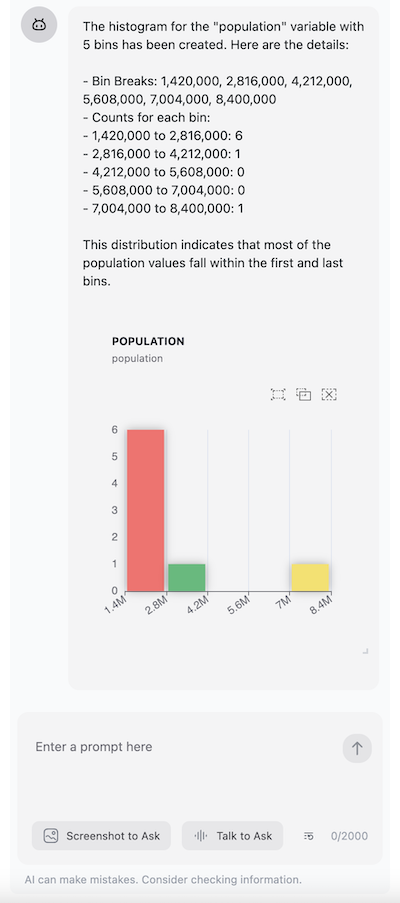
When user prompts e.g. "create a histogram of HR60 in dataset Natregimes", the LLM will call the histogram tool which will call the getValues() function to get the data, create a histogram, return the result to the LLM and invoke callback function onToolCompleted() with the tool call id and additional data. For example, the output of the result could be:
toolCallId call_HFlIW3My59rzp3fA3M4bWTjb
additionalData {
  id: '8i9xjm05iff',
  datasetName: 'Natregimes',
  variableName: 'HR60',
  histogramData: [
    { bin: 0, binStart: 1, binEnd: 2.8 },
    { bin: 1, binStart: 2.8, binEnd: 4.6 },
    { bin: 2, binStart: 4.6, binEnd: 6.4 },
    { bin: 3, binStart: 6.4, binEnd: 8.2 },
    { bin: 4, binStart: 8.2, binEnd: 10 }
  ],
  barDataIndexes: [ [ 0, 1 ], [ 2, 3 ], [ 4, 5 ], [ 6, 7 ], [ 8, 9 ] ],
}
See the full example code 🔗 here.

2. Create your own tool with context and callback function support
You can use extendedTool function in @openassistant/utils to create your own tool. It is a wrapper around the tool function from the ai package, and allows you to add context and callback function support to your tool. See Why use extendedTool section for more details.
For example, create a weather tool to return the weather from a weather station you installed at different cities.
npm install @openassistant/utils
import { extendedTool, convertToVercelAiTool } from '@openassistant/utils';
import { generateText } from 'ai';
import { z } from 'zod';

const weatherTool = extendedTool({
  description: 'Get the weather in a city from a weather station',
  parameters: z.object({ cityName: z.string() }),
  context: {
    getStation: async (cityName: string) => {
      // provide your own implementation to get the data from your application as a context
      const stations = {
        'New York': {
          stationId: '123',
          weather: 'sunny',
          timestamp: '2025-06-20 10:00:00',
        },
        'Los Angeles': {
          stationId: '456',
          weather: 'cloudy',
          timestamp: '2025-06-20 10:00:00',
        },
        Chicago: {
          stationId: '789',
          weather: 'rainy',
          timestamp: '2025-06-20 10:00:00',
        },
      };
      return stations[cityName];
    },
  },
  execute: async (args, options) => {
    // check if the context is provided
    if (!options || !options.context || !options.context['getStation']) {
      throw new Error('Context is required');
    }
    const getStation = options.context['getStation'];
    const station = await getStation(args.cityName);
    return {
      // the result returned to the LLM
      llmResult: {
        success: true,
        result: `The weather in ${args.cityName} is ${station.weather} from weather station ${station.station}.`,
      },
      // the additional data for e.g. rendering a component or saving to your database
      additionalData: {
        station,
      },
    };
  },
});

// use the tool in your application
const result = await generateText({
  model: openai('gpt-4o', { apiKey: key }),
  system: 'You are a helpful assistant',
  prompt: 'What is the weather in New York?',
  tools: { weather: convertToVercelAiTool(weatherTool) },
});
The possible output of the result could be:
The weather in New York is sunny from your weather station 123.
The additionalData is the data returned from the tool execution. You can use it to render a component or save it to your database.
See the full example code 🔗 here.
3. Add a React Chat Component to your App
OpenAssistant also provides a chat component @openassistant/ui that helps you build your AI application with an interactive chat interface quickly. It can be used in browser-only web applications.
Installation
npm install @openassistant/ui
Usage
import { AiAssistant } from '@openassistant/ui';
// for React app without tailwindcss, you can import the css file
// import '@openassistant/ui/dist/index.css';

function App() {
  return (
    <AiAssistant
      modelProvider="openai"
      model="gpt-4"
      apiKey="your-api-key"
      version="v1"
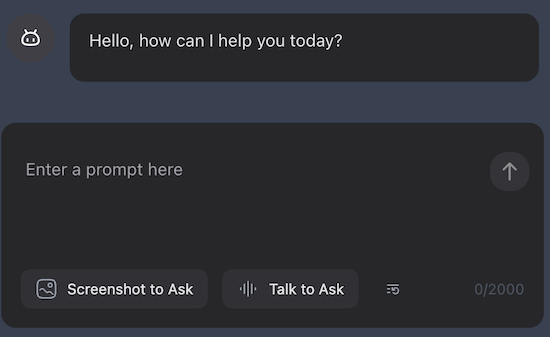
      welcomeMessage="Hello! How can I help you today?"
      instructions="You are a helpful assistant."
      functions={{}}
      theme="dark"
      useMarkdown={true}
      showTools={true}
      onMessageUpdated=({messages}) => {
        console.log(messages);
      }}
    />
  );
}

See the source code of the example 🔗 here.
If you are using TailwindCSS, you need to add the following configurations to your tailwind.config.js file:
import { nextui } from '@heroui/react';
...

module.exports = {
  content: [
    ...,
    './node_modules/@heroui/theme/dist/**/*.{js,ts,jsx,tsx}',
    './node_modules/@openassistant/ui/dist/**/*.{js,ts,jsx,tsx}',
  ],
  theme: {
    extend: {},
  },
  darkMode: 'class',
  plugins: [nextui()],
};
See the source code of the example 🔗 here.
Use Tools with chat component
For a quick example:
localQuery in @openassistant/duckdb
This tool helps to query any data that has been loaded in your application using user's prompt.
- the data in your application will be loaded into a local duckdb instance temporarily
- LLM will generate SQL query based on user's prompt against the data
- the SQL query result will be executed in the local duckdb instance
- the query result will be displayed in a React table component
In your application, the data could be loaded from a csv/json/parquet/xml file. For this example, we will use the SAMPLE_DATASETS in dataset.ts to simulate the data.
export const SAMPLE_DATASETS = {
  myVenues: [
    {
      index: 0,
      location: 'New York',
      latitude: 40.7128,
      longitude: -74.006,
      revenue: 12500000,
      population: 8400000,
    },
    ...
  ],
};
- Import the
localQuerytool from@openassistent/duckdband use it in your application. - Provide the
getValuesfunction in thecontextto get the values from your data. - Use the tool in your AI assistant chat component
import { localQuery, LocalQueryTool } from '@openassistent/duckdb';

// load your data
// pass the metadata of the data to the assistant instructions
const instructions = `You are a helpful assistant. You can use the following datasets to answer the user's question:
  datasetName: myVenues,
  variables: index, location, latitude, longitude, revenue, population
  `;

// use `LocalQueryTool` for type safety
const localQueryTool: LocalQueryTool = {
  ...localQuery,
  context: {
    ...localQuery.context,
    getValues: (datasetName: string, variableName: string) => {
      return SAMPLE_DATASETS[datasetName][variableName];
    },
  },
};

// use the tool in the chat component
<AiAssistant
  modelProvider="openai"
  model="gpt-4o"
  apiKey="your-api-key"
  version="0.0.1"
  welcomeMessage="Hello! How can I help you today?"
  instructions={instructions}
  functions={{ localQuery: localQueryTool }}
/>
See the source code of the example 🔗 here.
For message persistence, see the example 🔗 here.
4. Use a uniform interface for different AI providers
If you want to build your own chat interface, you can use the OpenAssistant core package @openassistant/core, which provides
- a uniform interface for different AI providers
- a set of powerful LLM tools (data analysis, visualization, mapping, etc.)
- an interactive React chat component (optional)
for building your own AI assistant, along with a design allows you to easily create your own tools by :
- providing your own context (e.g. data, callbacks etc.) for the tool execution
- providing your own UI component for rendering the tool result
- passing the result from the tool execution to the tool UI component or next tool execution.
Installation
Install the core packages:
npm install @openassistant/core
Usage
Then, you can use the OpenAssistant in your application. For example:
import { createAssistant } from '@openassistant/core';

// get the singleton assistant instance
const assistant = await createAssistant({
  name: 'assistant',
  modelProvider: 'openai',
  model: 'gpt-4o',
  apiKey: 'your-api-key',
  version: '0.0.1',
  instructions: 'You are a helpful assistant',
  // functions: {{}},
  // abortController: null
});

// now you can send prompts to the assistant
await assistant.processTextMessage({
  textMessage: 'Hello, how are you?',
  streamMessageCallback: ({ isCompleted, message }) => {
    console.log(isCompleted, message);
  },
});
See the source code of the example 🔗 here.
If you want to use Google Gemini as the model provider, you can do the following:
Install vercel google gemini client:
npm install @ai-sdk/google
Then, you can use update the assistant configuration to use Google Gemini.
OpenAssistant also supports the following model providers:
| Model Provider | Models | Dependency |
|---|---|---|
| OpenAI | models | @ai-sdk/openai |
| models | @ai-sdk/google | |
| Anthropic | models | @ai-sdk/anthropic |
| DeepSeek | models | @ai-sdk/deepseek |
| xAI | models | @ai-sdk/xai |
| Ollama | models | ollama-ai-provider |
See a more complex example of using OpenAssistant core package to create a multi-step tool 🔗 here.
🎯 Examples
Check out our example projects:
- Basic Example
- Custom Function Example
- Multiple Step Tools
- Message Persistence Example
- React with TailwindCSS Example
- Tool Example: Plots
- Tool Example: DuckDB
- Tool Example: Data analysis
- Next.js Example
- Tool Example: Kepler.gl map
- Tool Example: Leaftlet map
- Tool Example: Vega-Lite
📄 License
MIT © Xun Li